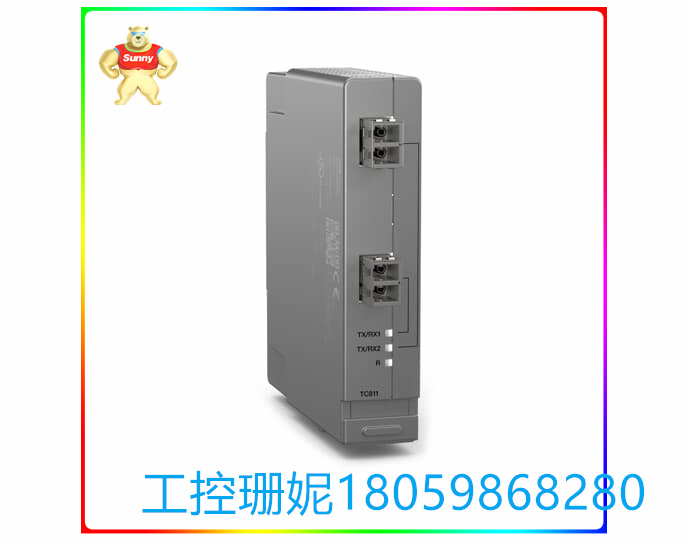
☆型号:TC-201-02-4M5 扩张器接口 处理器模块

【产品详情】
产品概述
Trusted®TMR扩展器处理器模块位于Trusted的处理器插槽中
扩展器机箱,并在扩展器总线和扩展器之间提供“从”接口
机箱背板。扩展器总线允许使用
非屏蔽双绞线(UTP)电缆连接,同时保持容错、高
带宽模块间总线(IMB)功能。
模块为膨胀机总线、模块本身和膨胀机提供故障控制
底盘,确保这些潜在故障的影响是局部的,并确保系统可用性
大化。该模块具有HIFT TMR架构的容错功能。全面的诊断,
监控和测试提供了快速的故障识别。热备用和模块备用
支持配置,允许自动和手动修复策略
特征:
•三模冗余(TMR)、容错(3-2-0)操作。
•硬件实现的容错(HIFT)体系结构。
•专用的硬件和软件测试制度,可提供非常快速的故障识别和
响应时间。
•自动故障处理,无干扰报警。
•热更换。
•显示模块运行状况和状态的前面板指示灯
要安装模块,请执行以下操作:
1.确保电缆总成的位置正确。
2.使用释放键释放模块上的弹出器卡舌。确保推料器
选项卡完全打开。
3.握住弹出器,小心地将模块插入预期插槽。
4.按压模块蒙皮的顶部和底部,将模块完全推入原位。
5.关闭模块弹出器,确保它们卡入锁定位置。
2.2.模块更换
更换模块必须插入空闲的处理器插槽中,确保
模块位置正确,弹出器卡舌关闭(请参阅模块插入和
拆卸)。新安装的模块将执行其通电顺序。
确保新安装的模块上的发光二极管(LED)指示灯如下
跟随:
LED 1健康A稳定绿色
LED 2健康B稳定绿色
LED 3健康C稳定绿色
如果原始模块已报告故障,则TMR处理器可自动启动
转换到新安装的模块。手动切换可以使用
原始模块上的弹出器卡舌或通过诊断接口使用命令。到
使用弹出器卡舌启动转换,使用以下顺序:
1.使用
弹出器释放工具。请勿拆下模块。
2.等待,直到原始模块指示其处于待机操作模式
并且新安装的模块处于活动模式。
3.拆下原来的模块。
注意:在任何情况下都不得移除指示ACTIVE模式的模块。有源模块的拆卸
可能导致机箱中的模块采用默认(关闭)状态,并启动关闭状态
通过应用程序。
☆型号:TC-201-02-4M5 扩张器接口 处理器模块

【英文介绍】
Product overview
The Trusted®TMR extender processor module is located in the Trusted processor slot
The extender chassis and provides a "slave" interface between the extender bus and the extender
Chassis backplane. The extender bus is allowed
Unshielded twisted pair (UTP) cable connection while maintaining fault tolerance and height
Bandwidth Intermodule bus (IMB) function.
The module provides fault control for the expansion bus, the module itself, and the expansion machine
The chassis ensures that the impact of these potential failures is localized and ensures system availability
Dahua. The module has fault tolerance of the HIFT TMR architecture. A comprehensive diagnosis,
Monitoring and testing provide rapid fault identification. Hot standby and module standby
Supports configuration to allow automatic and manual repair policies
Features:
Three-mode redundancy (TMR), fault-tolerant (3-2-0) operation.
• Fault-tolerant (HIFT) architecture for hardware implementation.
• Dedicated hardware and software testing systems that provide very fast fault identification and
Response time.
• Automatic fault handling, no interference alarm.
• Hot replacement.
• Front panel indicators that show module health and status
To install the module, do the following:
1. Ensure that the cable assembly is correctly positioned.
2. Use the release key to release the ejector latch on the module. Secure the pusher
The TAB is fully open.
3. Hold the ejector and carefully insert the module into the intended slot.
4. Press the top and bottom of the module skin to completely push the module into place.
5. Close the module ejectors and make sure they are stuck in the locking position.
2.2. Replace the module
Ensure that the replacement module is inserted into an empty processor slot
Module position correct, ejector latch closed (see Module Insert and
Disassemble). The newly installed module will perform its power-on sequence.
Make sure the light emitting diode (LED) indicator on the newly installed module is as follows
Follow:
LED 1 Health A Stable green
LED 2 Health B Stable green
LED 3 Health C Stable green
If the original module has reported a failure, the TMR processor can start automatically
Convert to a newly installed module. Manual switching is available
The popup latch on the original module or use the command through the diagnostic interface. to
Use the popup latch to initiate the conversion, using the following sequence:
Step 1 Use
Popup release tool. Do not remove the module.
2. Wait until the original module indicates that it is in standby operation mode
And the newly installed module is in active mode.
3. Remove the original module.
Note: Under no circumstances should a module indicating ACTIVE mode be removed. Removal of active module
The modules in the chassis may adopt the default (off) state and start the off state
By application.
☆型号:TC-201-02-4M5 扩张器接口 处理器模块

【其他型号推荐】
| EMERSON 1C31203G01 | KEBA CU312 | HONEYWELL 05701-A-0330 | IW93 HESG440356R1 | SCXI-1300 NI |
| ENTERASYS A4H124-24TX P0973JM | KEBA CU313 | HONEYWELL 05701-A-0361 | jdsu 2213-75TSLKTB | SCXI-1302 NI |
| HONEYWELL CC-IP0101 | CV2000-CPU01-EV1 PLC | 05701-A-0511 | YOKOGAWA JGSM-06 | SCXI-1303 NI |
| ABB CI857K01 3BSE018144R1 | YASKAWA CVSR-404H | HONEYWELL 05701-B-0376 | JGSM-06 73051-00060 -1 YOKOGAWA | SCXI-1313A NI |
| ABB CI570 3BSE001440R1 | CX312B6 plc | EX2100 OEL | KJ3204X1-BA1 12P3275X032 KJ4001X1-CJ1 VE4002S1T2B5 | SCXI-1320 NI |
| FBM230 P0926GU | BECKHOFF CX1020-0000 | IC752SPL013-BA | KJ3241X1-BK1 12P4710X032 SE4006P2 | SCXI-1326 NI |
| ABB PCD232A 3BHE022293R0101 | CX1020-N000 CX1020-0011 BECKHOFF | IS200DSPXH1DBC | KOKUSAI CXP-544A KOMS-A2 | SCXI-1327 NI |
| ABB PFEA113 | Beckhoff CX1020N000 | IS200DSPXH1DBD | KJ3242X1-BK1 12P4711X052 | SCXI-1338 NI |
| PPD113B03-26-100100 3BHE023584R2625 | Beckhoff CX1500-M310 | IS200EPSMG2ADC | Kollmorgen S72402-NANANA-NA-225 | SCXI-1349 NI |
| ABB PPD113B03-26-100100 3BHE023584R2625 | BECKHOFF CX11000001 | IS200ERDDH1ABA | KUC321AE HIEE300698R0001 | Reliance S-D4006-F |


